
Prosthetics
Our goal is simple. We provide our patients with prosthetic devices that help them reach their ambulation and activity goals. With this in mind, our clinicians will carefully help patient’s choose the prosthesis that will best meet those needs.

the latest innovations
We provide the latest innovations for Upper and Lower prostheses, including:
Upper Extremity Prosthetics: All amputation levels, Conventional, Myoelectric, Bionic, and Proportional Control Systems.
Lower Extremity Prosthetics: All amputation levels including Partial Foot, Microprocessor Controlled Knee & Ankle Joints, Knee and Ankle Joint Systems, and Elevated Vacuum Systems.
Computer-Aided Design: Omega Tracer CAD shape-capturing systems.
Advanced Prosthetic Systems for:
Running
Bicycling
Golfing
Motorcycle Riding
Weight Lifting

Our clinicians
All of our clinicians are certified by the American Board for Certification in Orthotics, Prosthetics, and Pedorthics. ABC ensures clinicians meet the most rigorous requirements in education, experience, and examination in the industry.
prosthetic process
Learning to use an artificial limb is a process. It can take a few weeks for some and several months for others. The LEAP team is here to help you move through the rehabilitation.
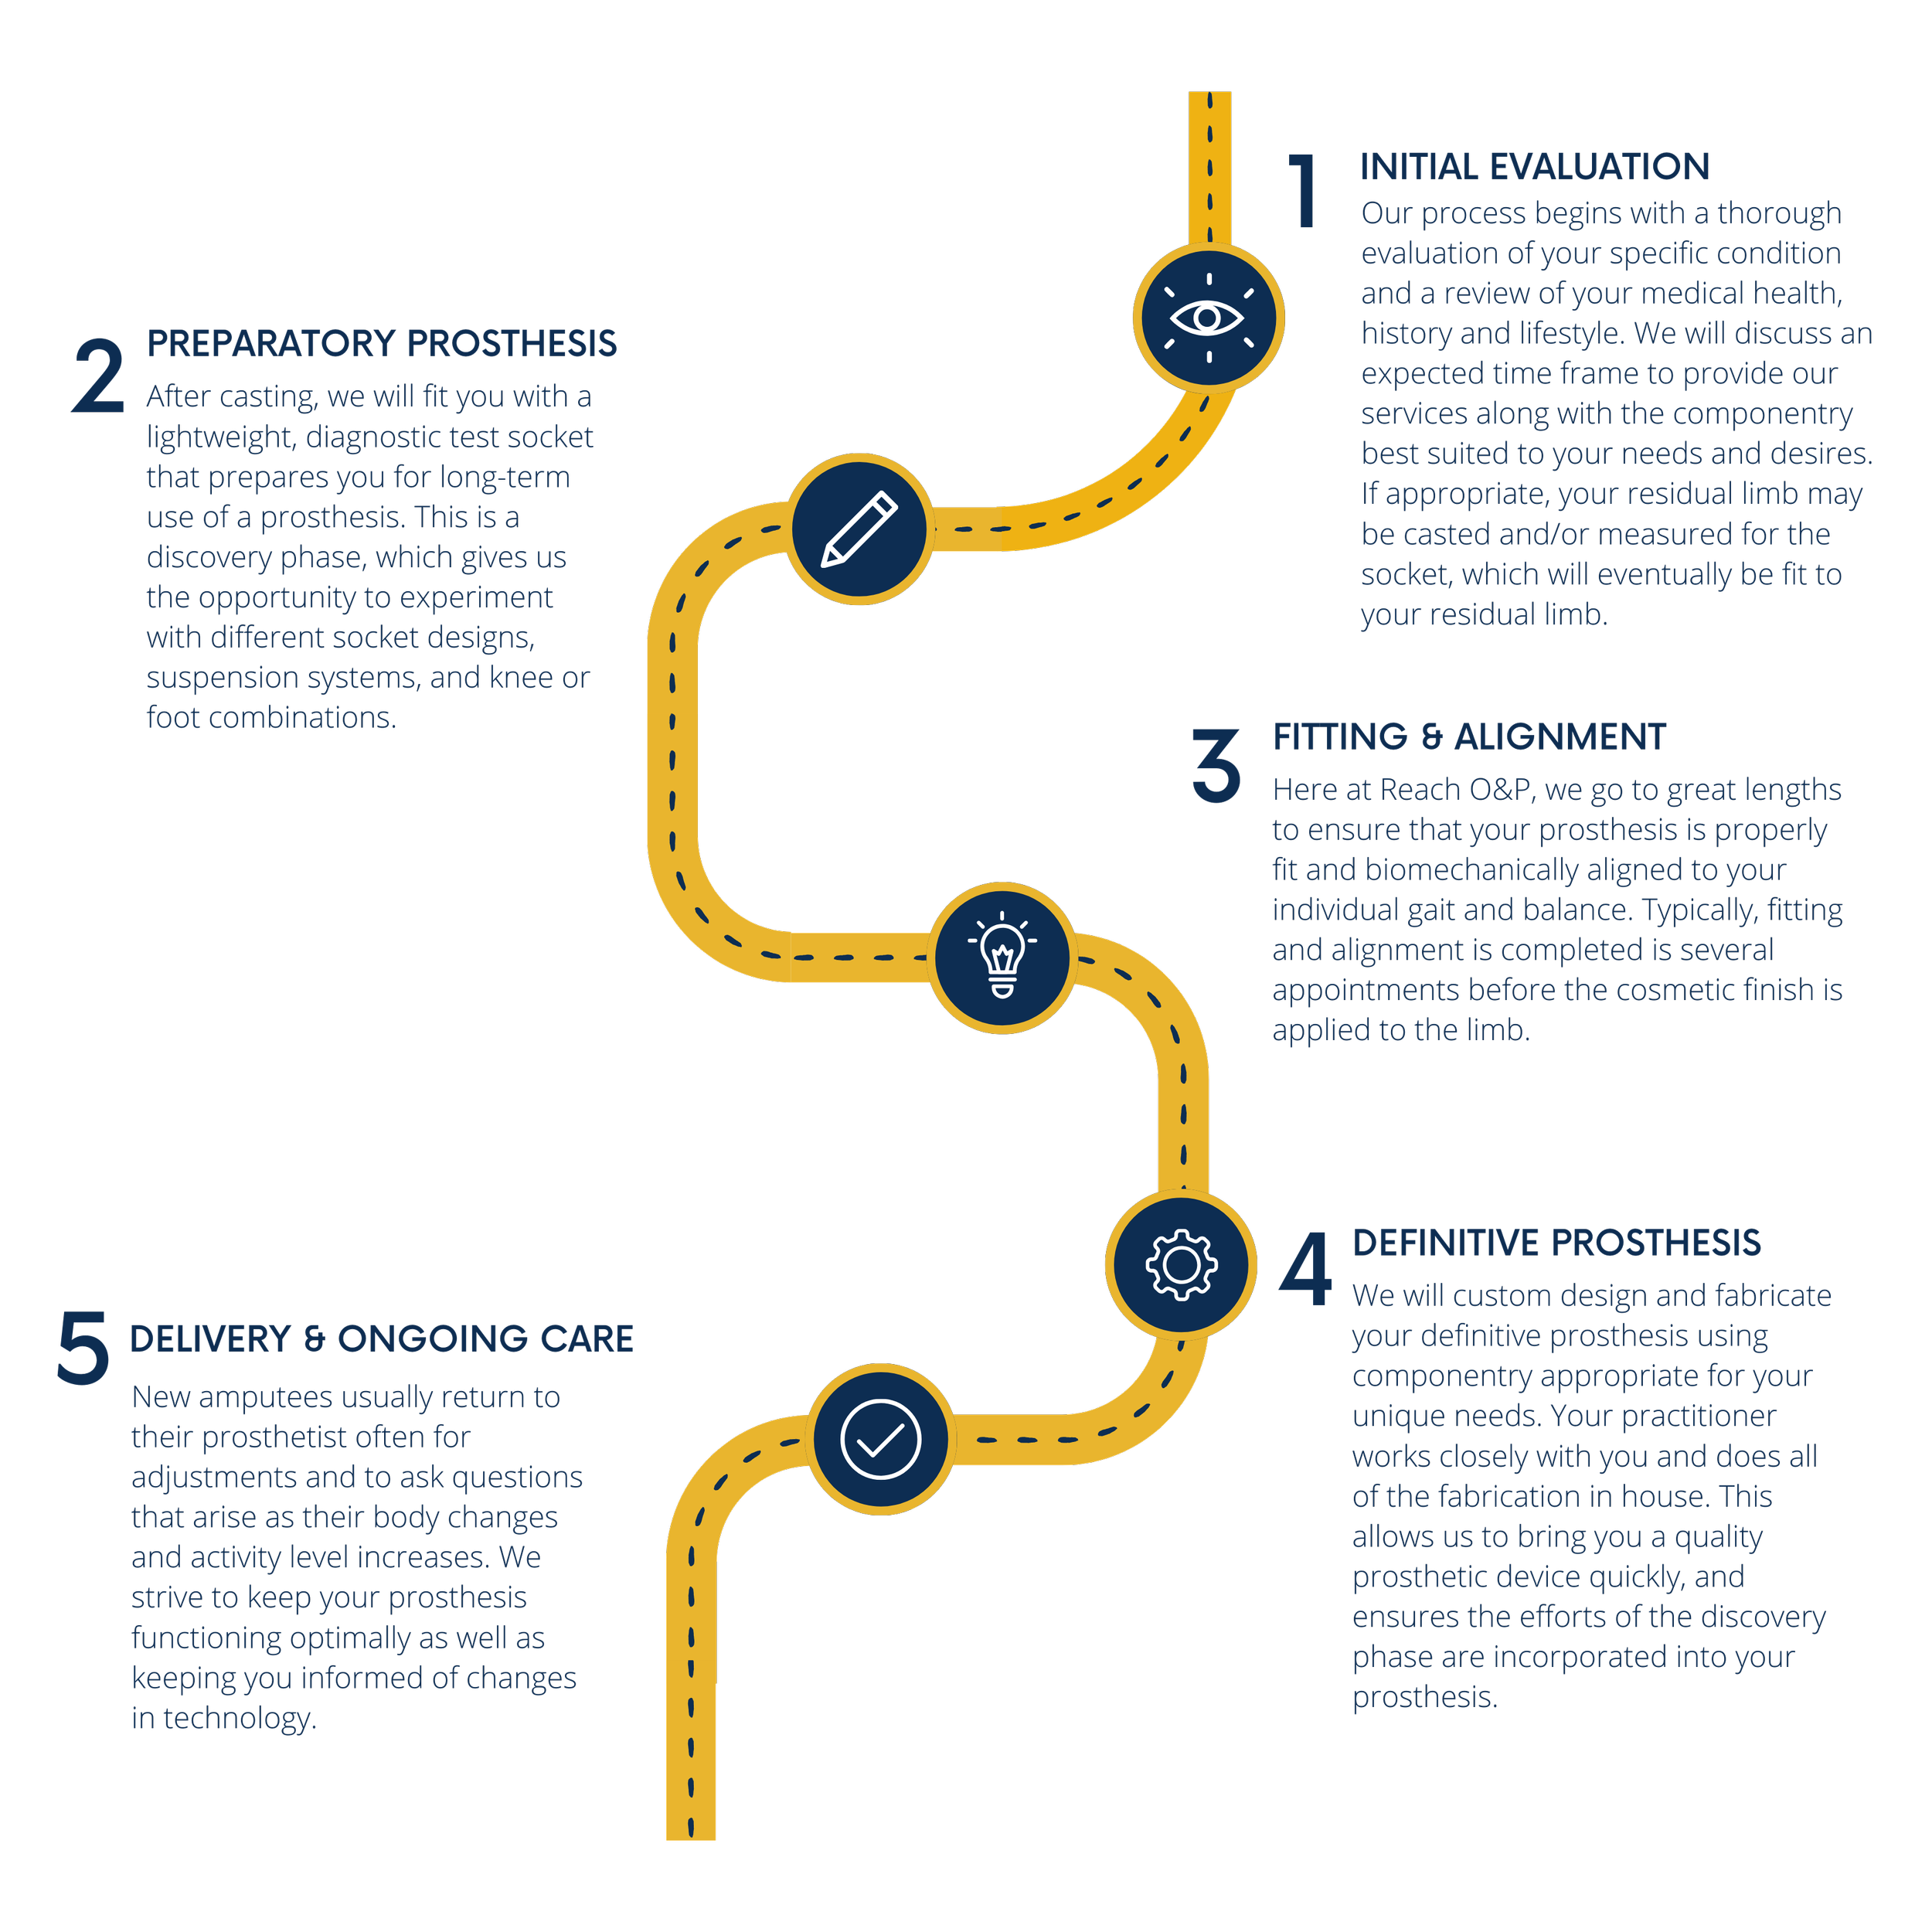

Prosthetic Care
pre-operative care | Counseling
-
Pre-operative peer counseling is available for patients who will undergo, or are presently dealing with, limb loss. Individuals can be aligned with one or more prosthetic users who are age and gender specific to help answer questions regarding their life experiences that often can go unaddressed. This can be done at their convenience by phone, in a hospital setting or at their home.
In conjunction with peer counseling, meeting with a certified clinician will provide a better understanding of the prosthetic process. These services can also be provided post-operatively.
Make sure to contact your prosthetist at 757-595-9800 if you have questions regarding our peer program.
Post-operative care
-
Post-operative care focuses on limb management and continued patient assessment. A clinical consultation is normally followed by the introduction of compression therapy, including commonly used textile shrinkers intended to manage edema and promote residual limb shaping. Additionally, there are traditional and non-traditional rigid dressings and complete prosthetic systems that can allow weight bearing therapies to be introduced.
Once the sutures or staples have come out, and the surgical wound has healed you can begin to prepare for your initial prosthesis. The following steps below are a guide working towards getting you ready for this to occur.
-
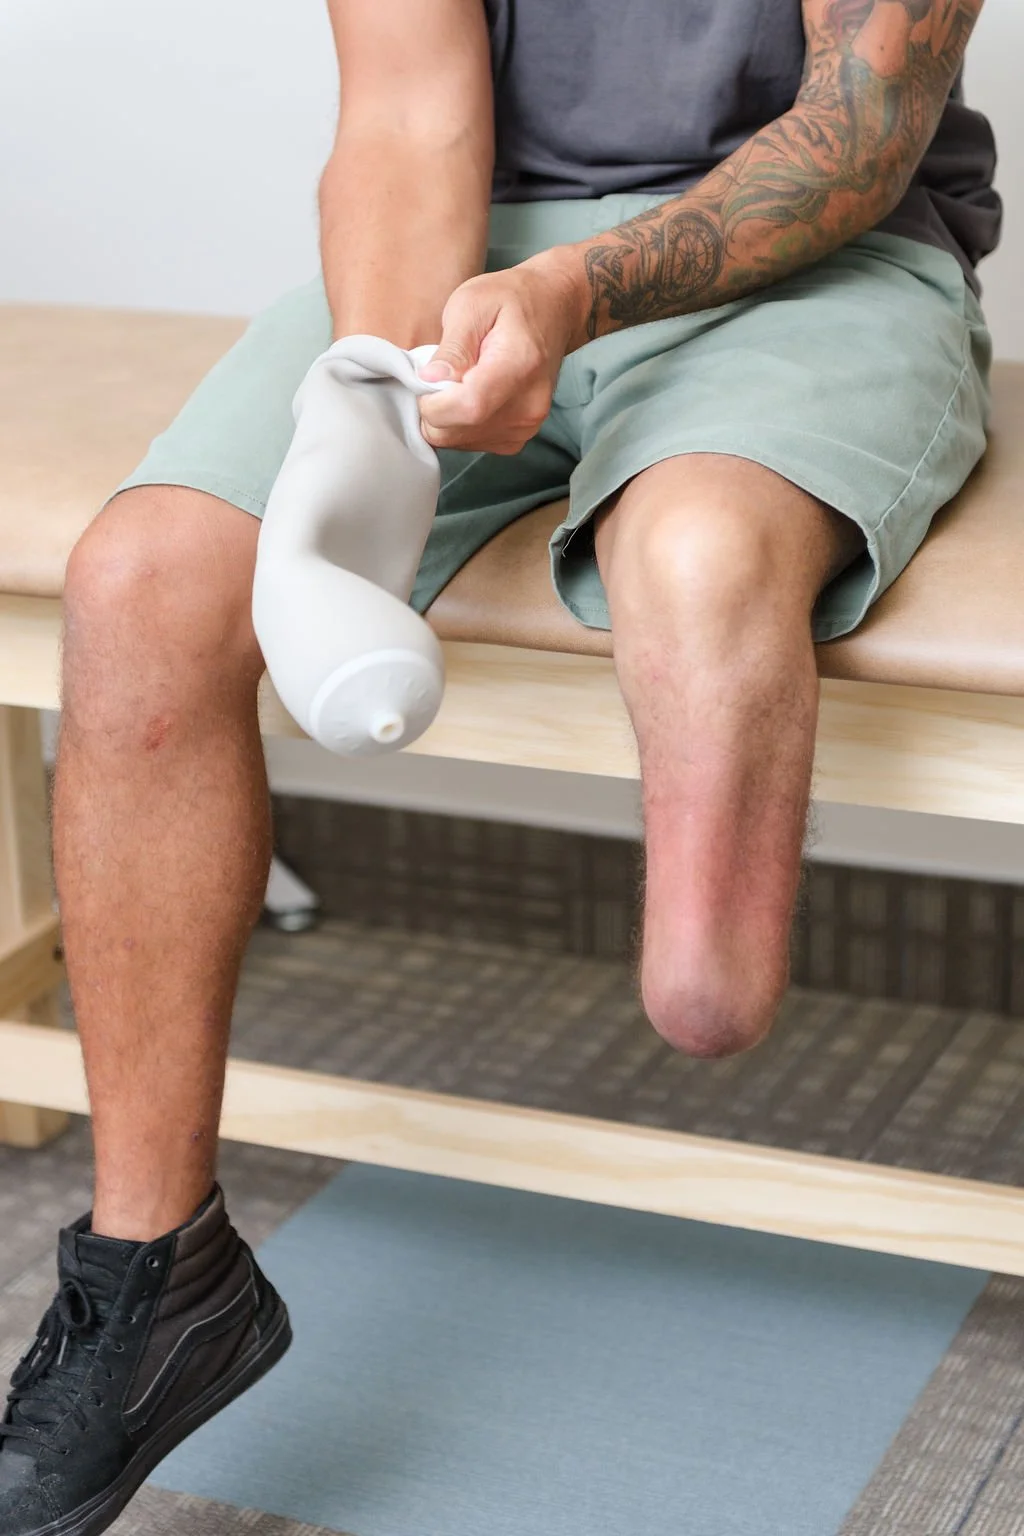
Following a lower or upper extremity amputation one of the initial steps on the road to recovery is compression therapy. Almost all surgical procedures will result in some form of swelling (edema) to the soft tissues which is a body’s natural protective response. This reaction is especially common following an amputation which is why compression therapy using a shrinker sock plays an important role. Before a prosthetic socket can be designed the limb must be shaped and swelling needs to be reduced and controlled.
While an elastic “Ace wrap” bandage is sometimes initially used, their application can be difficult to consistently apply. A cloth shrinker, when pulled over the residual limb, provides a more consistent even compression gradient which will help to control swelling and promote shaping of the soft tissues especially at the end of the limb. Shrinkers are normally worn once the majority of the suture line is healed and most if not all of the staples and/or stitches have been removed. The shrinker sock should be worn at all times except when bathing. Throughout the day you will need to keep it pulled up to maintain a snug fit at all times. It is common in time to need a smaller size shrinker as your limb changes, so communication with your prosthetist is key.
Once provided your initial prosthesis, limb volume reduction will continue. Most people experience the majority of limb shrinkage during the first year following surgery with gradual shrinkage (atrophy) occurring over time.
-
These are occasionally used for those considered a high fall risk and are generally made of a semi rigid plastic materials. They are applied over the limb to provide protection from impact during walking activities. RRD’s are often used in conjunction with a shrinker sock and help maintain the knee in extension to prevent contracture development to maintain full range of motion.
Make sure to contact your prosthetist at 757-595-9800 if you have questions regarding wear.
-
Rehabilitation Options :
Home Health Therapy
Skilled Nursing Facility
Out Patient Therapy
Functional Assessment
Prior to or in conjunction with prosthetic provision, rehabilitation can be offered in a number of settings to help the patent prepare physically and emotionally for prosthetic use. These services can be provided in acute rehabilitation hospitals, skilled nursing facilities or by home health therapists. While home therapy is an initial choice for many, more intensive rehabilitation can be provided at outpatient or inpatient facilities. A key part of the rehabilitation process includes a functional assessment of the patient’s strengths, limitations and goals to better define their plan of care.
Make sure to contact your prosthetist at 757-595-9800 if you have questions regarding post-operative rehabilitation.
-
Keeping your residual limb in the right position is vital. This helps prevent muscle shortening and tightening (contracture), which can prevent full range of motion. To avoid developing a contracture, you’ll need to keep your knee positioned as straight as possible when seated or lying down.
When seated, always support your residual limb to keep it from dangling or hanging. When sitting in a wheelchair or a regular chair, you can use an “extension board” which is a flat board that extends outward to support your residual limb. When lying down it is important to avoid propping your residual limb on pillows or blankets. Keep your residual limb flat, with your knee or hip as straight as you can as much as possible.
If your amputation is an above the knee, spending time lying flat on your stomach is helpful to stretch the hip and thigh muscles. These muscles get tight when you sit through out the day. It’s important to spend 15 to 20 minutes in this position several times a day to help maintain normal range of motion.
-
Following surgery the skin on your residual limb can be sensitive to touch. Desensitization through self-massage, rubbing, and/or tapping the end of your residual limb can help control this.
Begin with a light, gentle touch kneeing the skin and increase the pressure as your tolerance allows. Applying cocoa butter during massage hydrates and helps improve the health of your skin especially along the suture line.
-
Many individuals who have undergone an amputation experience some degree of phantom limb sensation or phantom limb pain. It is thought to occur due to the interruption of signals sent from the brain through the nerves that were extending into the now missing leg or arm.
The sensations are often described as feeling all or part of the missing extremity, whether it be an itch on the toes and foot or in more severe cases the feeling of the extremity being in a cramped position or a burning sensation. There some reports of a correlation in the intensity of phantom limb syndrome considering how much preoperative pain someone experienced versus the cause of the amputation. There are a number of therapies to treat phantom limb ranging from massage techniques to “mirror therapy”. If you experience significant symptoms contact your physician to see what treatments are recommended.
-
Caring for your residual limb is not very different than caring for the rest of your body, with a few exceptions. Commonly roll-on gel liners are used as a means of suspending the prosthesis and protecting the limb while weight bearing.
Washing your residual limb, using a wash cloth, warm water and a mild antibacterial soap, is recommended at least once a day. You want to avoid the use of soaps with deodorant properties, heavy scents or other additives. Soaps containing these items often leave a residual residue in the pores of the skin. In the case of using a roll-on liner, these properties cannot emit and remain in the pores, which can cause a rash-like skin reaction. If not properly treated it can result in an inability to use their prosthesis until the skin clears. If you need to apply any creams or moisturizers to the skin, do so at night to ensure proper absorption before resuming prosthetic use. When in doubt contact your prosthetist.
-
As your limb is healing you need to keep the muscles in your residual limb strong and flexible. Doing any exercises you were taught in the hospital is an important part of preparing for prosthetic use and will help prevent contracture development. The stronger one is prior to getting their prosthesis the easier time can be had when it comes to relearning the mechanics of walking.
-
There is no doubt that amputation changes your life. Gaining knowledge goes a long way in helping you move forward both emotionally and physically.
In addition to the care instructions you get from your rehab team, these simple tips can help make your life easier from the beginnings of life with amputation, to settling into your new normal.
Here are a few tips to make your home safer and more comfortable when you get home from the hospital.
General Tips:
Have a set of crutches on-hand and practice using them before you get home.
Set up a comfortable place in your home where you can rest as you recover. Include an area within arm’s reach to store all of the things you regularly use.
Ensure furniture placements allow clear paths and plenty of room to navigate.
Assemble a wardrobe with clothing that is easy to get on and off.
Pockets, shoulder bags and fanny packs are a great method for carrying items without using your hands.
A rolling stool, chair or wheelchair can help you get around. It’s a good idea to have a stool near your bed to help you get to the bathroom at night.
Nightlights (and motion detected nightlights) make it easier to navigate when looking for light switches in the dark.
Remote anything you can. There are all kinds of systems to turn on things like, fans, music, and lights. Amazon and Google make voice activated devices that give you general information and more.
Bathroom Tips:
Install grab bars in your shower and next to your toilet.
Get a shower bench for use in your shower.
Place a non-slip bath mat in front of the shower to help prevent slipping as you are getting in and out.
Install hooks next to your shower to help keep towels in reach of your bath seat.
Use a shower head with a hand-held wand to move the water source instead of your body.
Organize the items you use every day and place them within reach.
Consider a handicap height toilet – this is a good long-term investment.
Most of all have support in place. Healing takes time and having practical help and supportive people around you will make the adjustment easier. Many have successfully gone before you in this journey. You can do it!

PREPARATORY prosthetics
-
While technological innovation in the world of prosthetics has never been more promising, there are some older, effective strategies still used to maintain the fit of a socket such as prosthetic socks. Long before modern day foams and gel materials came along, wool socks were about the only measure to adjust for limb size changes and provide a degree of padding inside an otherwise hard prosthetic socket. Socks are normally provided in 5 ply, 3 ply and 1 ply thicknesses and are applied over the roll on liner when used.
Especially for the new user, understanding the importance of adding or deleting sock ply throughout the day can improve the socket fit and avoid abrasion against the residual limb. If using a below knee prosthesis and one experiences excessive pressure on the knee cap or towards the bottom of the limb, adding a ply or two of sock can help to offload these sensitive areas and restore the socket fit. Likewise for an above knee user excessive pressure in the groin or towards the bottom of the limb can also be relieved through additional sock ply. Some find their fit can vary from morning to night so keeping a few socks on hand at work or school can be a helpful tool.
-
Caring for the soft tissues of the remaining limb is an important part of successful prosthetic use. In the case of someone wearing a liner it can be helpful to clean the residual limb with a mild soap free from deodorant properties, heavy scents or other additives such as dyes. Soaps containing these items often leave a residual residue in the pours of the skin that normally emit throughout the day giving off an aroma. In the case of using a roll on liner these properties cannot not emit and remain in the pours which can cause a rash like skin reaction. If not properly treated it can result in an inability to use their prosthesis until the skin clears. If you need to apply any creams or moisturizers to the skin, do so at night to ensure proper absorption before resuming prosthetic use.
When it comes to perspiration issues there has not been proven one method successful for all. Perspiration has a lot to do with body type and a previous predisposition to excessive sweating. While there are some roll on liners that claim to be able to manage moisture factor such as a person’s level of activity, their climate/environment and the time of year can all lend itself to this issue. Different remedies from antiperspirant use, use of a nylon sock beneath the liner have proved successful for some. Others find removing the prosthesis for short periods to dry their limb and liner during the day is just as beneficial. Understand that different medications and foods can trigger perspiration so research different remedies that may be suggested by your dermatologist or prosthetist.
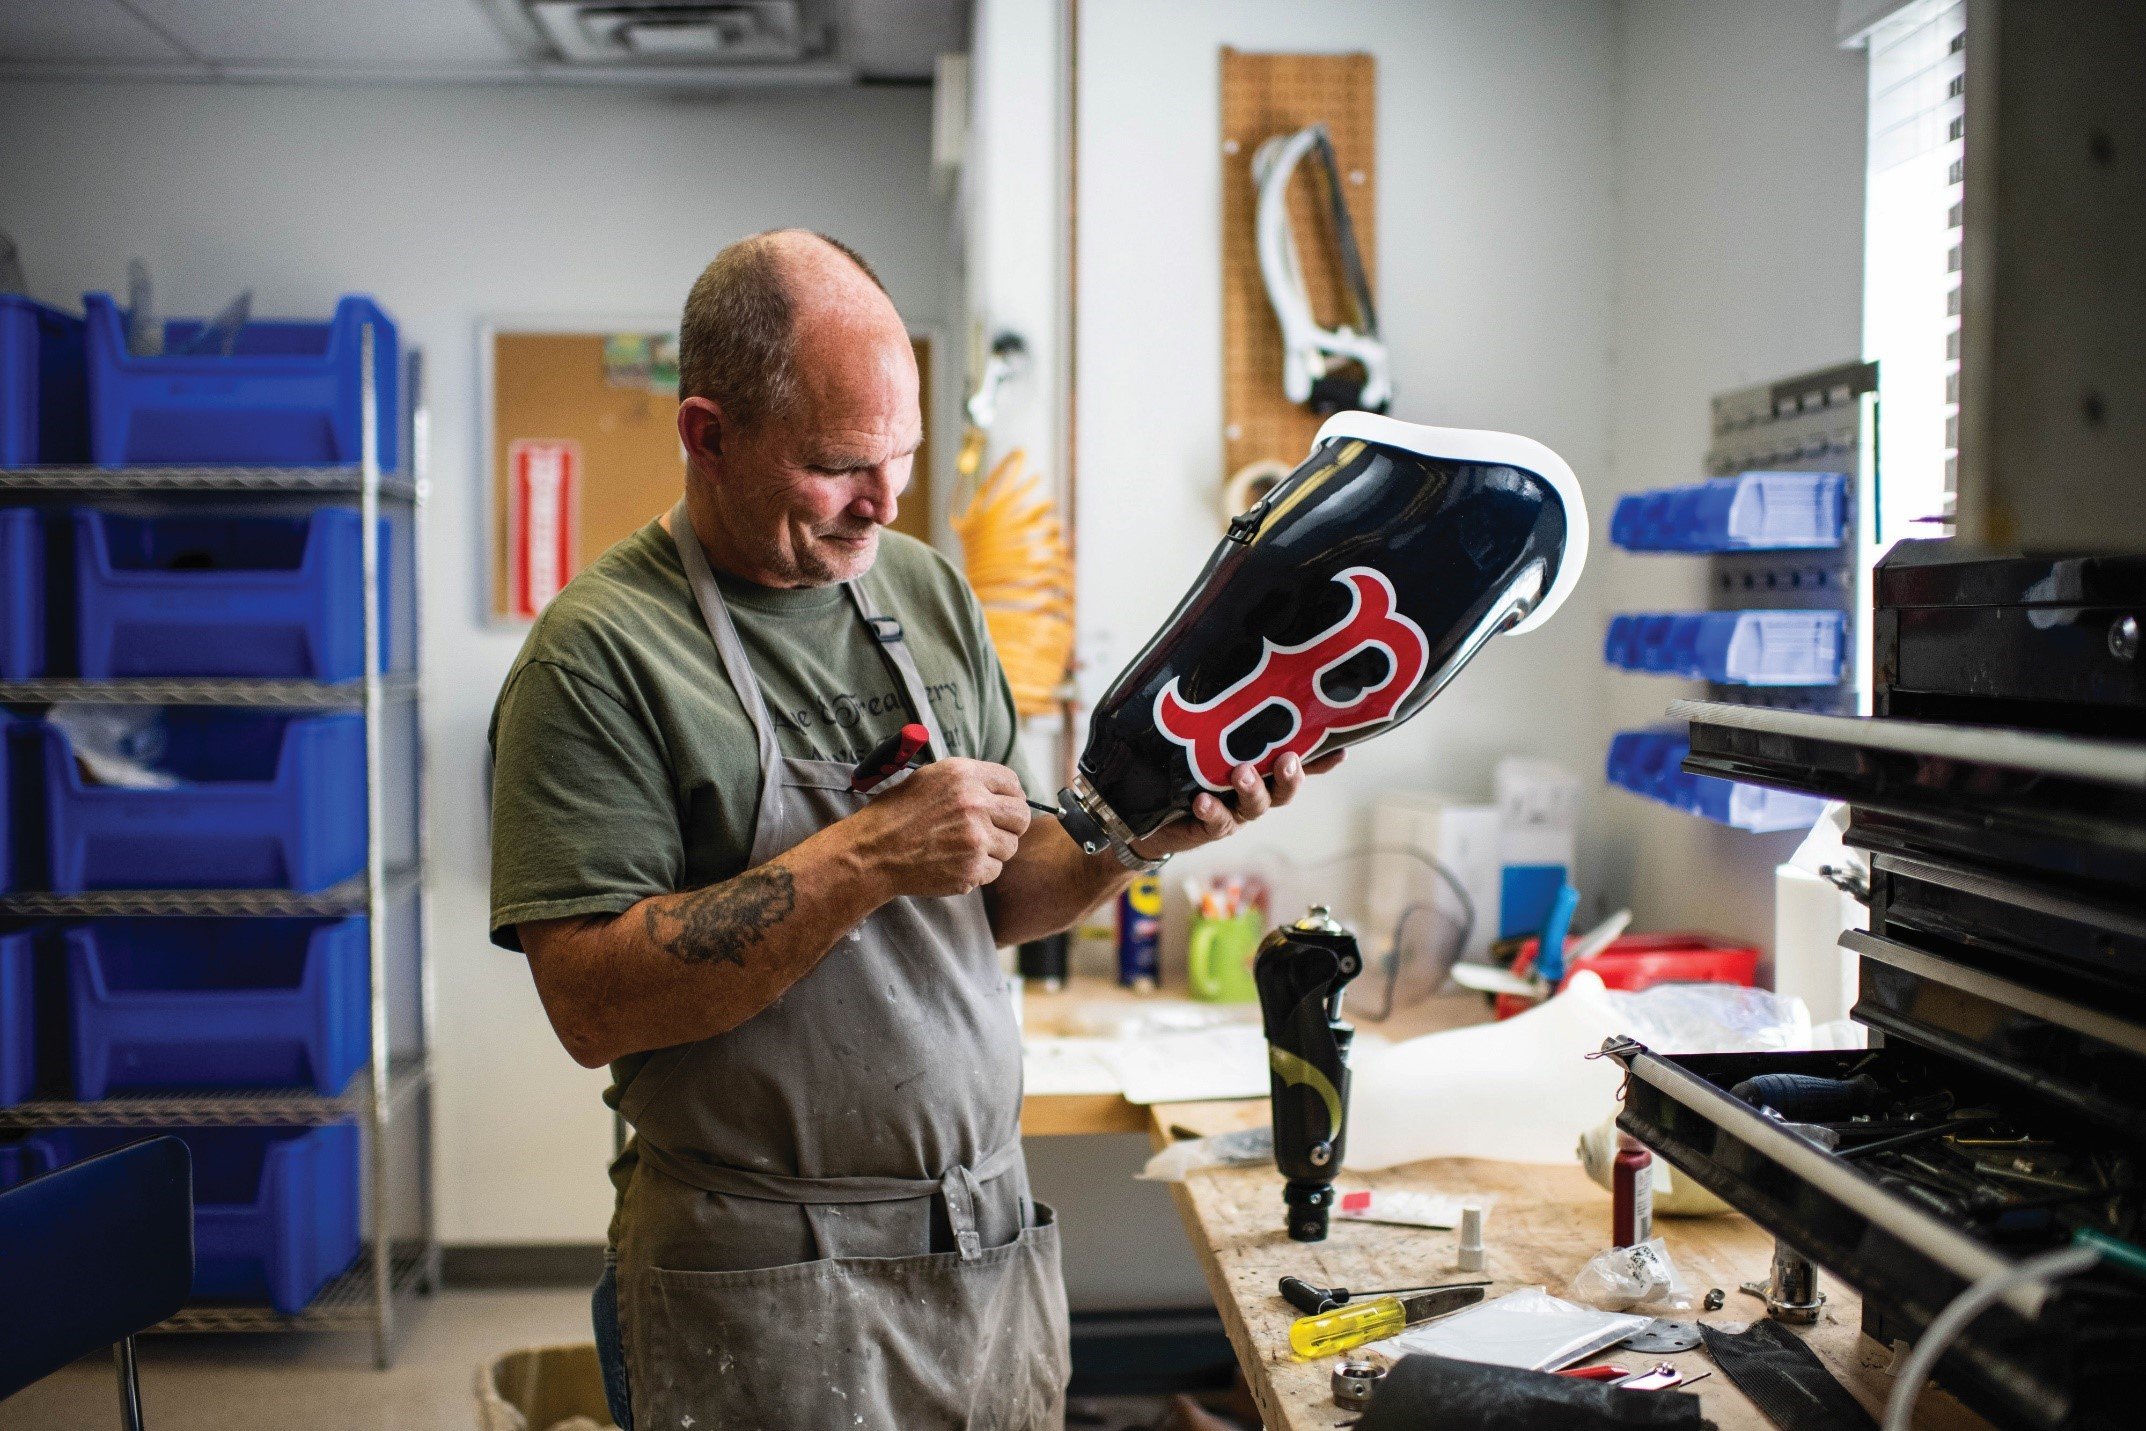
definitive Prothesis
-
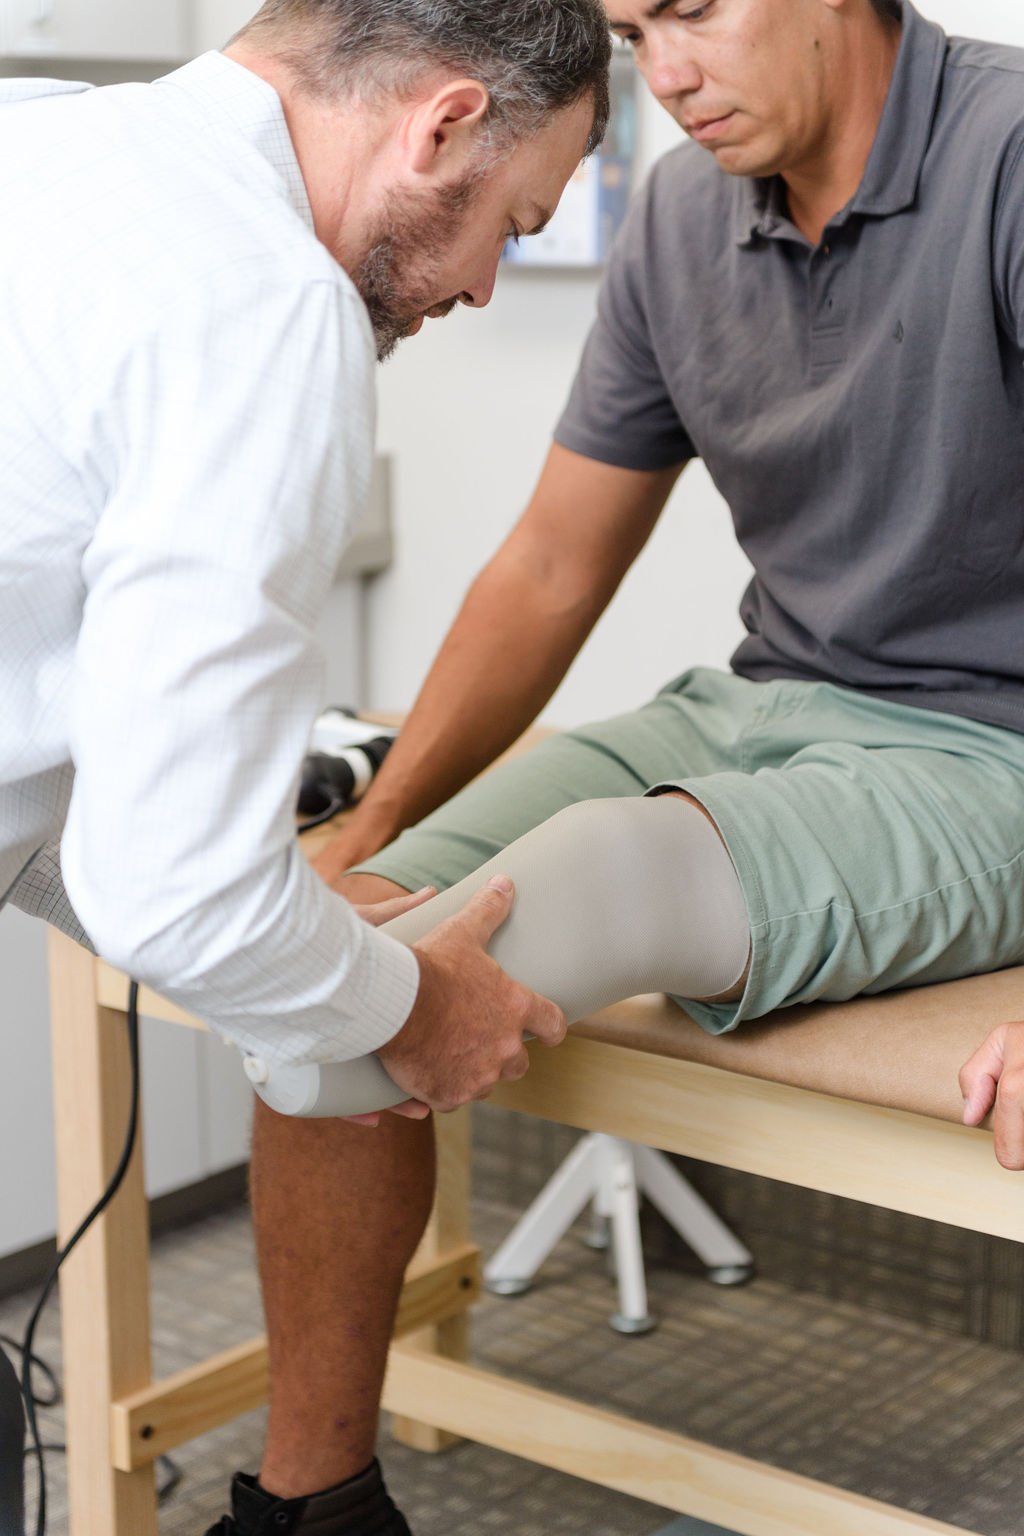
After successful use of the preparatory prosthesis any information learned from how the patient performed and/or any modifications made to ensure successful use are considered in the development of the definitive device. While often changes to the residual limb are the most significant occurrence, functional needs are also assessed to determine what changes to socket configuration or component selection are required. These factors may include the selection of a different socket suspension system as well as different performing prosthetic feet. In addition, for the above knee user, there are a number of knee options to enhance stability and safety. If not used on the initial prosthesis application of microprocessor knee technology is often considered. These knees are designed to sense and respond by better matching computer collected data based on how the individual walks. They have the ability to instantly increase or decrease resistance to the knee joint whether on level or uneven surfaces. These knees can also distinguish between stair and ramp activities and adjust themselves accordingly.
Donning and Doffing
-
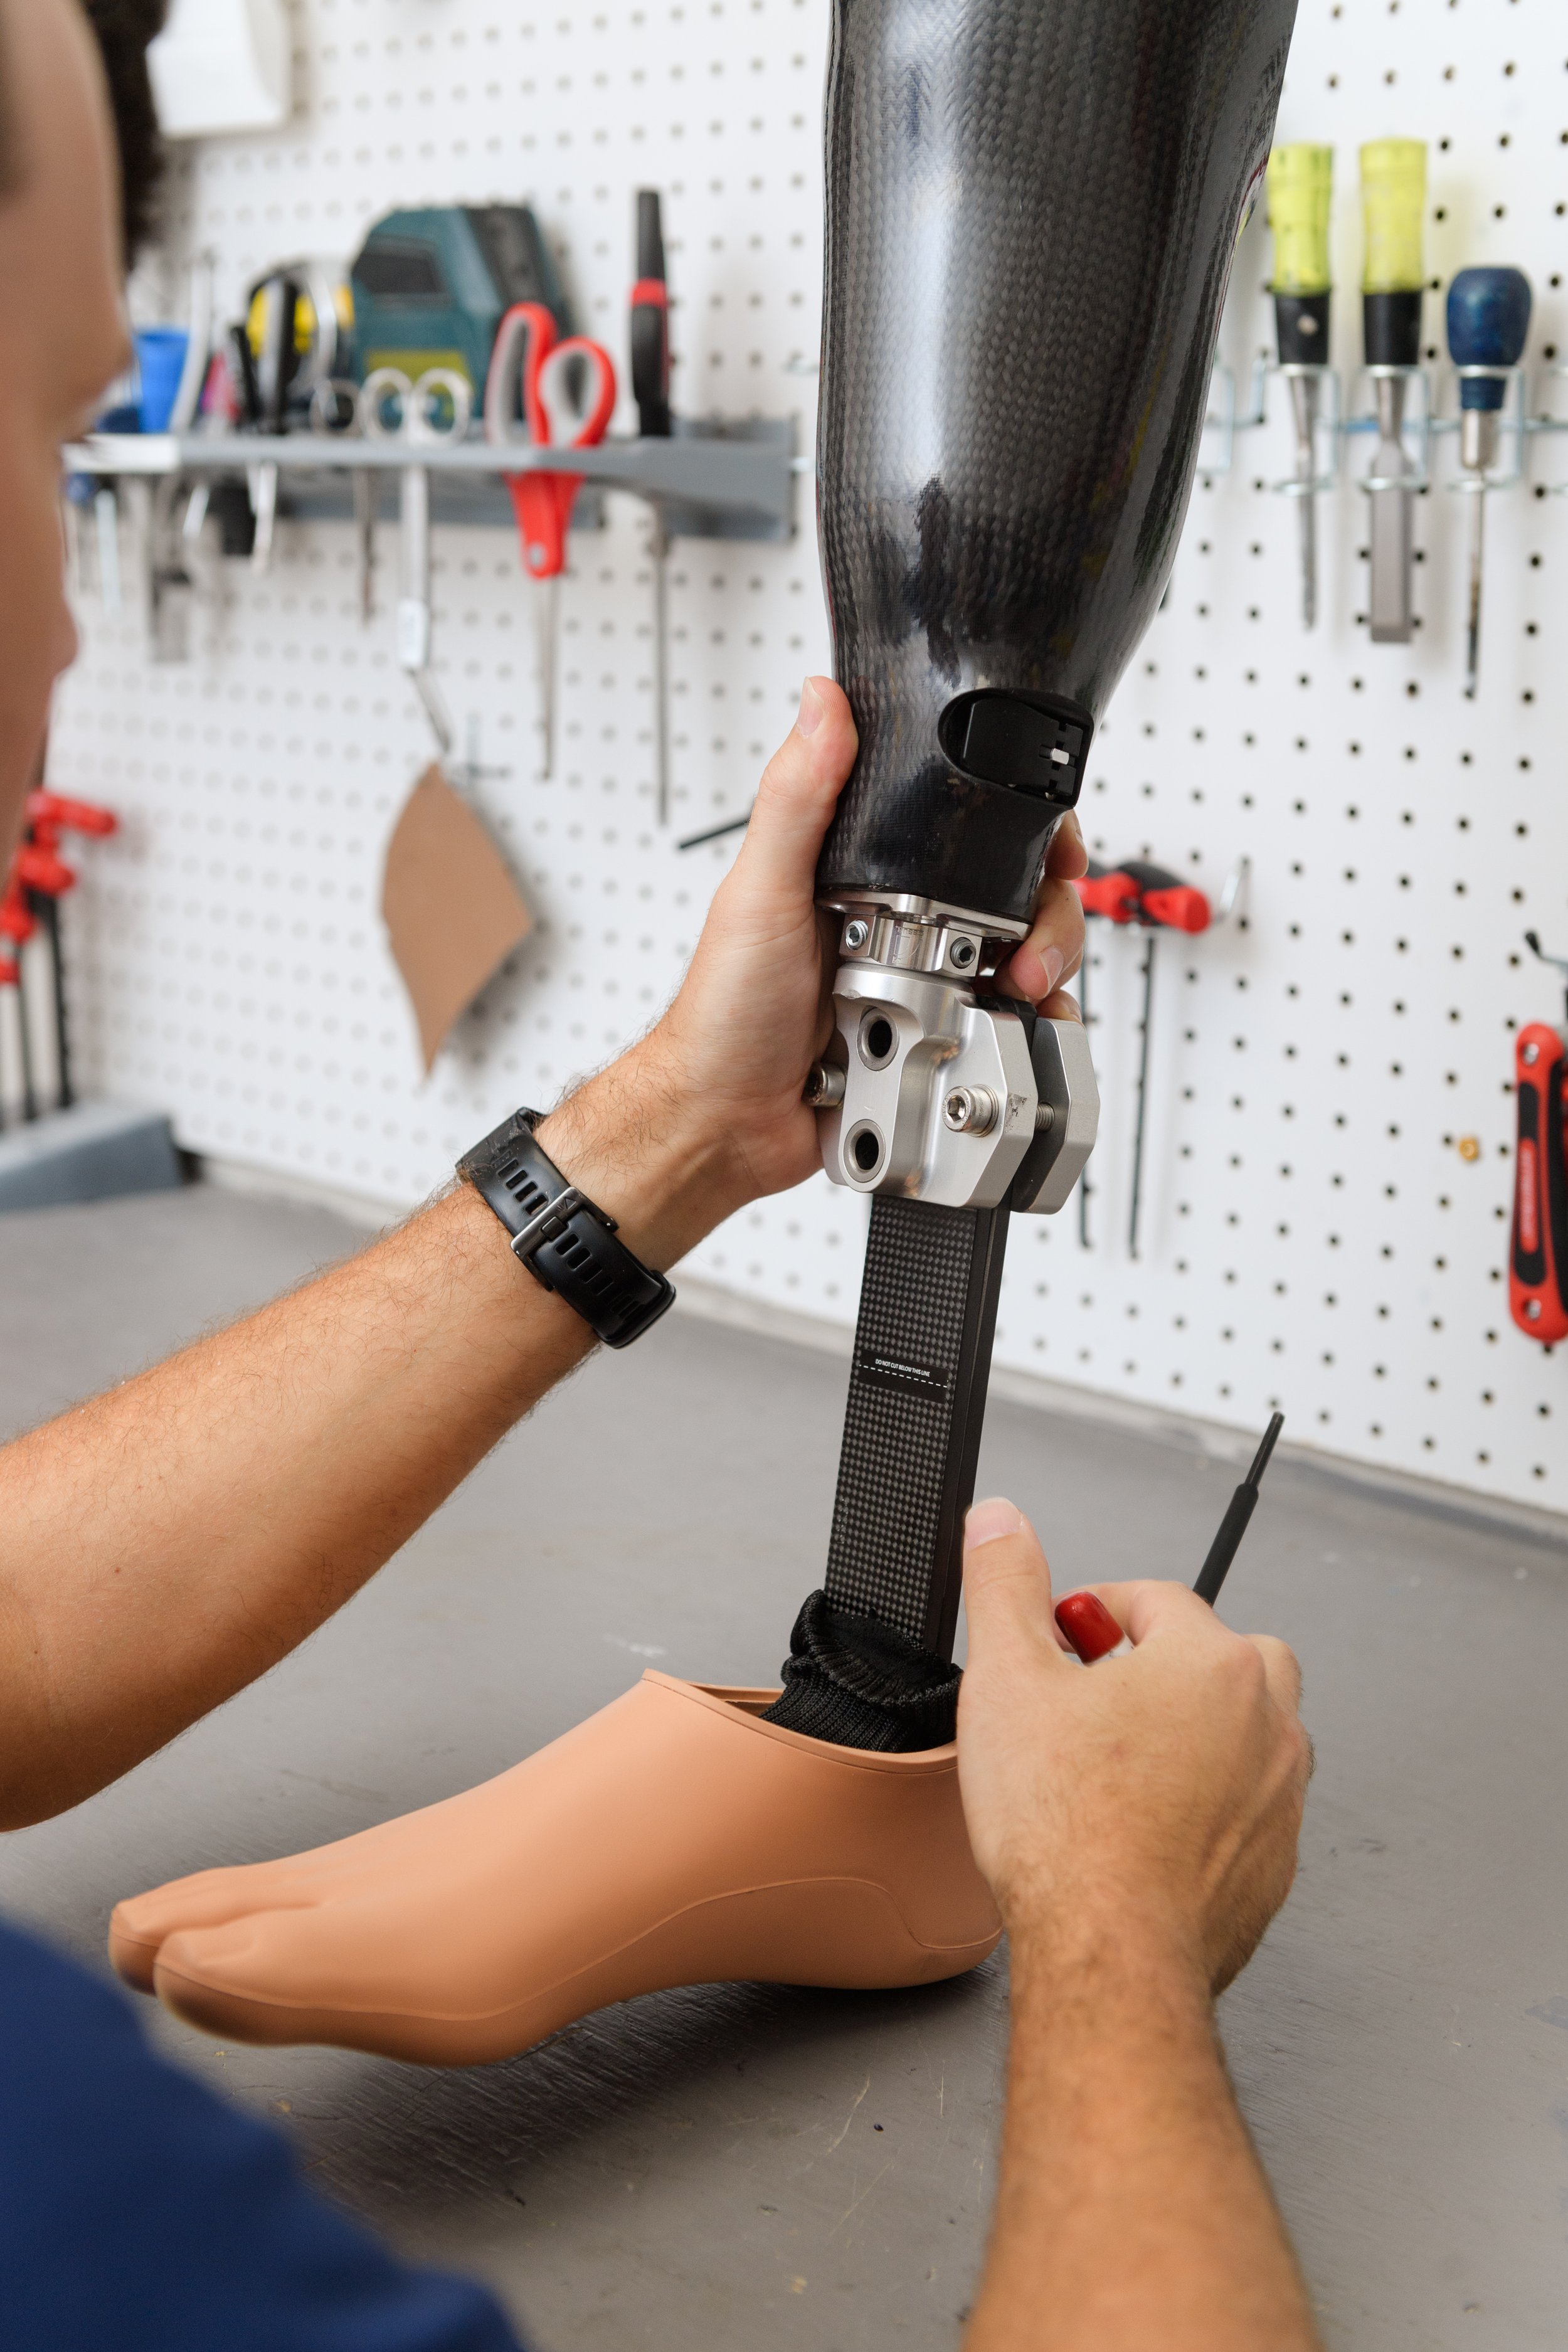
Roll on gel liners, how to don
Invert the gel liner fully inside out and center the end of it directly against the bottom of the limb without trapping an air pocket.
Using the palms of your hands evenly roll the liner upward while insuring the angle of the locking pin is aligned correctly. If it is not, remove the liner and repeat the process.
If needed apply any socks over the outside of the liner making sure the locking pin is exposed through the end of the sock and smooth out any wrinkles.
While seated place the limb inside the socket to engage the pin into the lock until clicks are heard. If necessary one may need to stand to get the pin to engage.
If no clicks are heard the lock likely has not engaged because the pin is not properly aligned. In this case remove the liner and repeat the donning process.
Do not excessively force the limb into the prosthesis.
When in doubt contact your prosthetist.
Roll on gel liners, how to doff
In a seated position depress the lock release button and with draw the limb from the socket. If the button does not easily depress push downward on the top of your knee while depressing the button.
Once the limb is out of the socket remove any socks and roll the liner down.
-
Used only for a below the knee prosthesis, sealing sleeve systems often are paired with a gel cushion liner (no locking pin) which is applied to the body in the same manner as a pin locking liner.
With the limb placed in the socket, a sealing sleeve is applied over the outer upper portion of the socket and pulled up onto the thigh creating a seal against the skin.
A one way expulsion valve is normally integrated at the base of the socket to allow air to expel creating a form of suction suspension. The valve is removed to ease taking the prosthesis off.
-
Seal-In Gel Liner Systems
These liner styles can be applied to below or above knee prosthetic designs and incorporate a flexible gasket seal that creates a form of suction suspension.
When the limb is placed in the socket the gasket compresses against the inner socket wall creating a seal. A suction valve is placed at the bottom of the socket to expel any remaining air and removed to release the suction seal to doff the device.
Cleaning gel liners
Proper liner cleaning will help prevent skin issues from developing and extend liner life.
With the liner inverted apply a small amount of clear mild liquid hand soap to the gel side of the liner with your hand to remove and dry skin, body hair or other debris.
Using warm water thoroughly rinse the soap residue completely off of the gel and wipe dry with a lint free cloth.
Always store the liner with the fabric side out placing a lint free cloth stuffed inside to maintain liner shape.
Care and use
-
When you are not wearing your prosthesis, you should be wearing your shrinker. This will help reduce limb volume fluctuations that can cause fitting problems. The shrinker should be pulled on so that there is no gapping at the end, no wrinkling, and no bunching at the top which could restrict blood flow. Also, keep the shrinker pulled above your knee. You will have to keep adjusting your skrinker throughout the day as it will tend to shift, and slip, eventually working its way off your residual limb. We will provide you with a roll-on adhesive to help keep your shrinker from slipping.
Care Tips:
Hand wash your shrinker using a mild soap and hang to dry. You will be provided at least two shrinkers so that one is available while laundering the other. If your shrinker is not worn properly, issues can occur and cause problems in fitting your prosthesis.
Make sure to contact your prosthetist at 757-595-9800 if you have questions regarding wear.
-
CARING FOR YOUR PROSTHESIS
Since you will be relying on the prosthesis to help you walk, it is important to know how to take care of it. By following the suggestions listed below you should be able to maintain the prosthesis in good working order. The rules for caring for your prosthesis are:
Keep the prosthesis clean and dry
Prevent water damage to the prosthesis
Store prosthesis properly
Keep Prosthesis Clean and Dry
As with your residual limb, it is important to wash your prosthesis daily to prevent the buildup of sweat, dirt and bacteria. Clean the inside of the prosthesis with a damp cloth and mild soap. Wash the part of the socket that touches your skin, the soft liner if you have one, and any rubber padding.
DO NOT immerse the prosthesis fully in water. Wipe off the soap with a clean cloth and dry the prosthesis completely. It is a good idea to wash it in the evening so it can dry overnight before you wear it again.
Prevent Water Damage
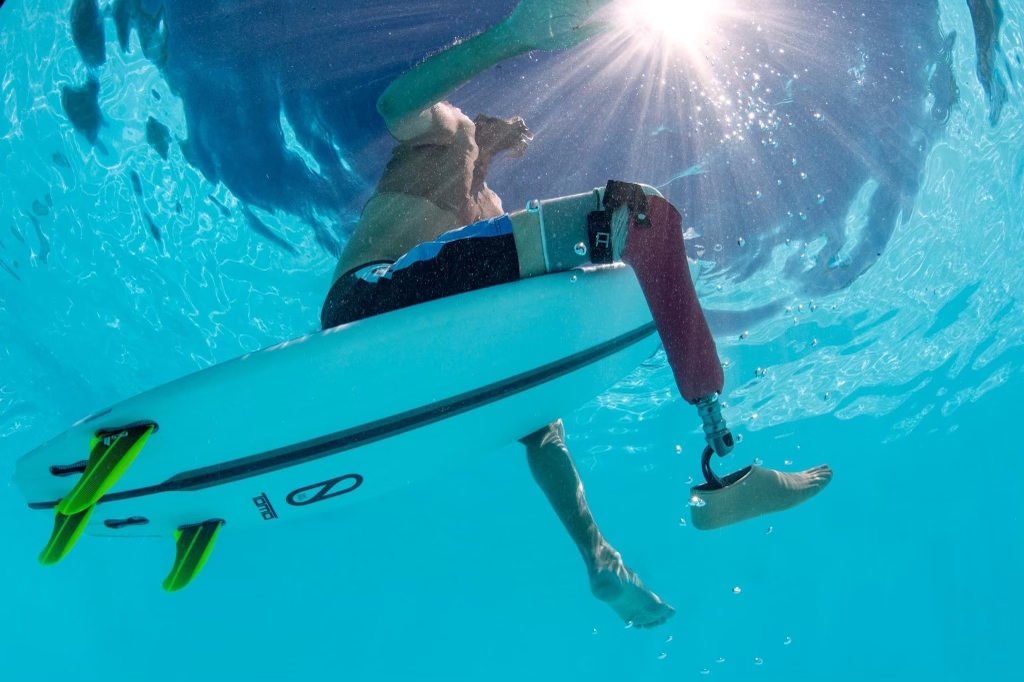
Water damage can develop if a standard prosthesis is immersed in fresh or salt water over time. DO NOT swim, shower, or bathe with it on. You may want to discuss the option of a waterproof prosthesis with your prosthetist if you are involved in water sports.
Store Carefully
When you are not wearing your prosthesis, prop it carefully against a wall where it will not get bumped or knocked over. DO NOT store prosthesis in a hot environment such as in direct sunlight in a parked car, near an oven, or near a radiator.
Remember NEVER attempt to make any adjustments to your prosthesis. If something becomes loose, is working incorrectly, is making strange noises or is suddenly uncomfortable, stop using it and contact your Prosthetist IMMEDIATELY!